How to setup personal blog by blogdown and githup pages
Building Your Own Website
Table Of Contents
Introduction
Have you ever thought about making your own website using R and Rstudio? This tutorial would teach you how to create your personal blog via blogdown and github. What’s more, automatically eploying your website is also necessary by using github actions.
Prerequisites
Before running the tutorial, you need have this software in your PC
Registering github account
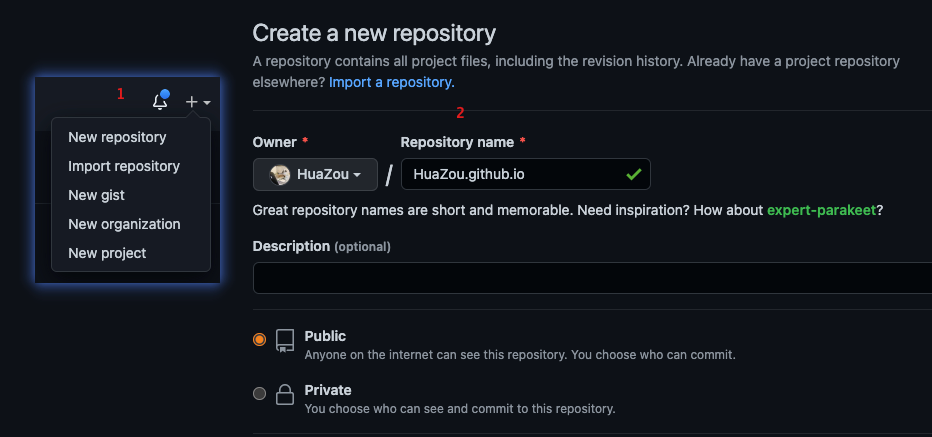
Please go to github to obtain your own account. Then create a new repository named [your_github_names].github.io which is applied to render your github pages.
Creating repository for blog
Creating another private repository (named MyOwnWebsite) to save your files which are used to setup blog. Here, suggesting users create two repositories to deploy personal website according to the protection of personal privacy.
- [your_github_names].github.io for saving blog html files
- MyOwnWebsite for saving blog source files
Setting your ssh key
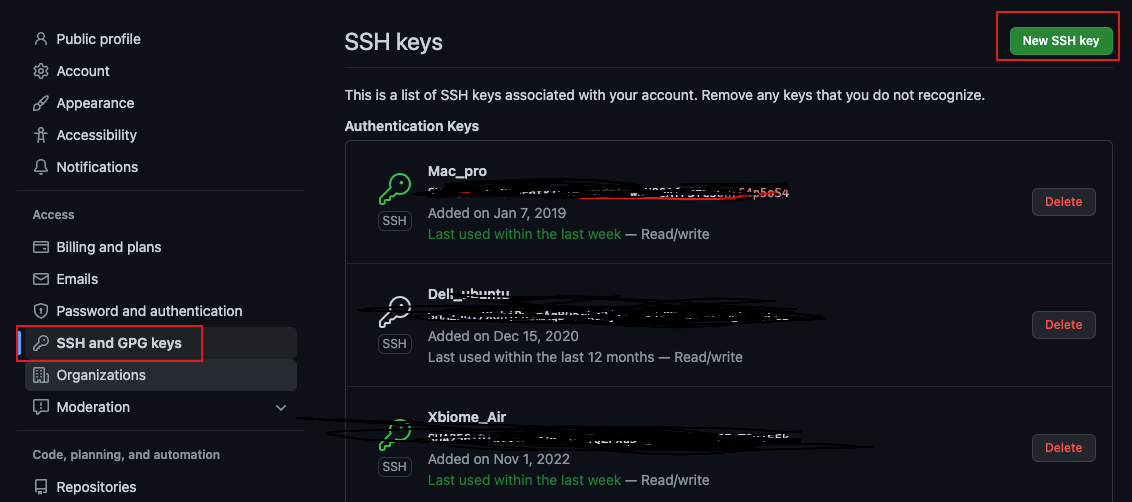
Once you created github repository for your blog, and then you need download git bash software (as for mac os, using terminal) to generate your ssh key in your personal computer. Firstly, configuring your git with name and email. Secondly, generating the ssh key by rsa algorithm. Finally, uploading your public ssh key to github Personal photo -> Settings -> SSH and GPG keys
# configure
git config --global user.name "Hua Zou"
git config --global user.email "zouhua1@outlook.com"

# generate ssh key
ssh-keygen -t rsa -C "zouhua1@outlook.com"
Checking whether the setting is okay
ssh -T git@github.com

# Hi HuaZou! You've successfully authenticated, but GitHub does not provide shell access.
Install Blogdown and Hugo
Blogdown which Creating Blogs and Websites with R Markdown is necessary for building website
# Install blogdown
#install.packages("blogdown")
remotes::install_github('rstudio/blogdown')

# Install Hugo
blogdown::install_hugo()
Creating blogdown project
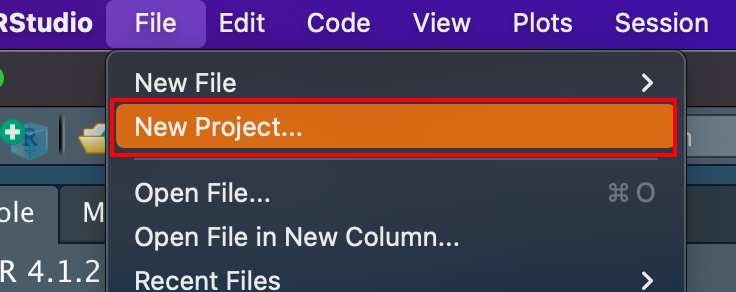
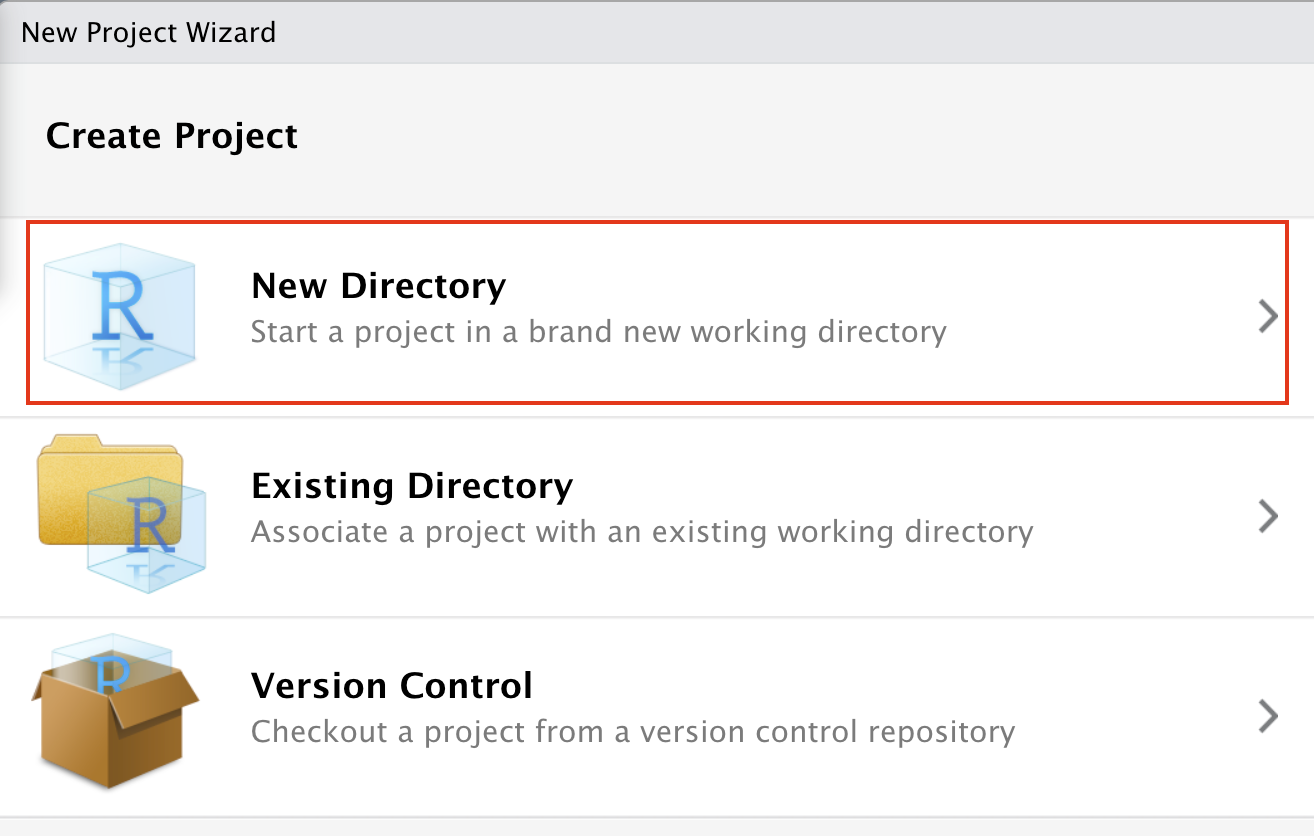
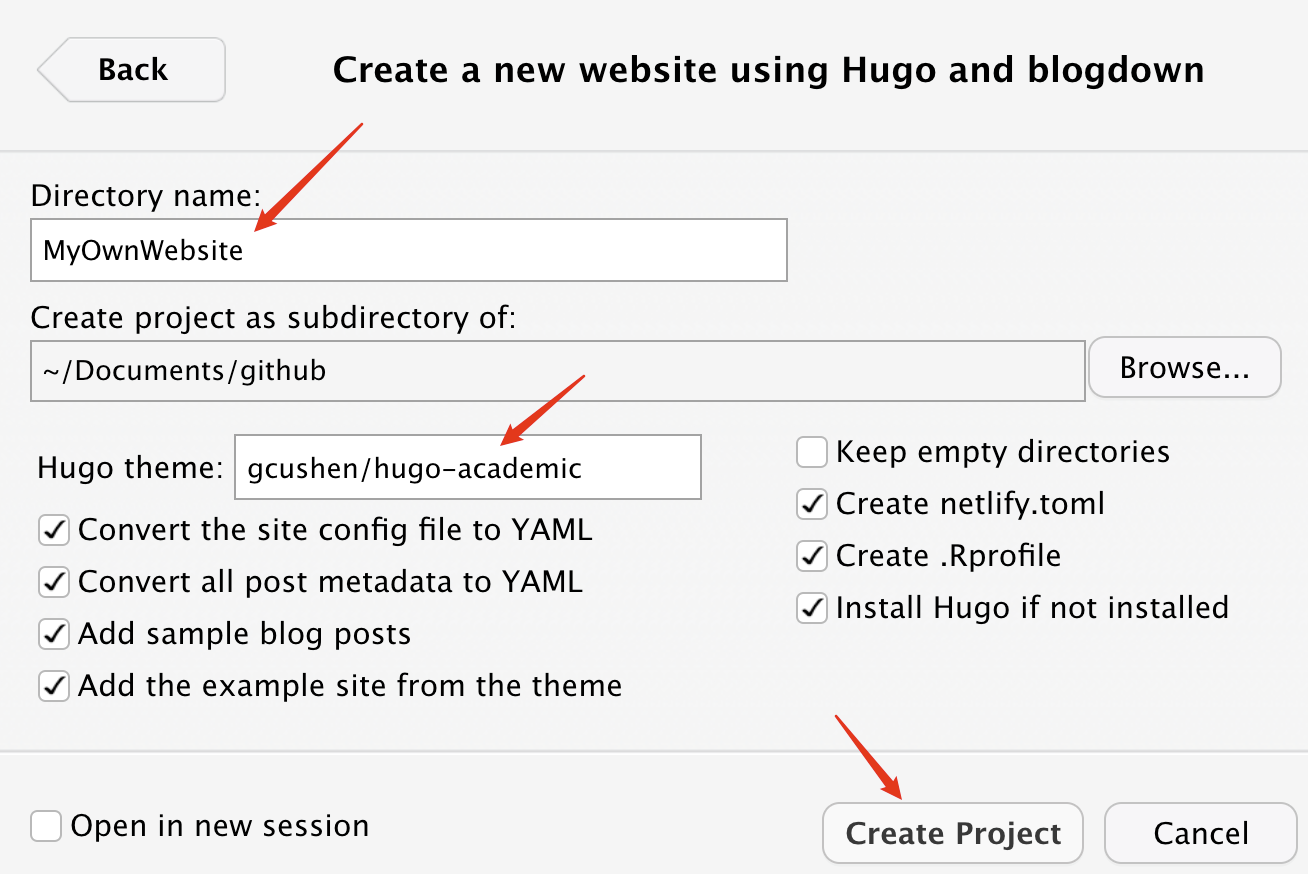
Firstly, open Rstudio to create New Project -> New Directory -> Website using blogdown and then give MyOwnWebsite to Directory name, and then setting Hugo theme by gcushen/hugo-academic. Finally, Kick Create Project to generate website.
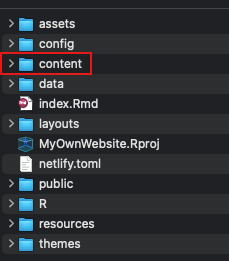
Then, opening Rstudio to create blogdown project (File -> New Project -> Website using blogdown -> New Prject Wizard -> Create Project). YOu could see the following files and directories.

the final website folder like this
Building website
To build the website by using hugo_build from blogdown R package.
blogdown::hugo_build(local=TRUE)
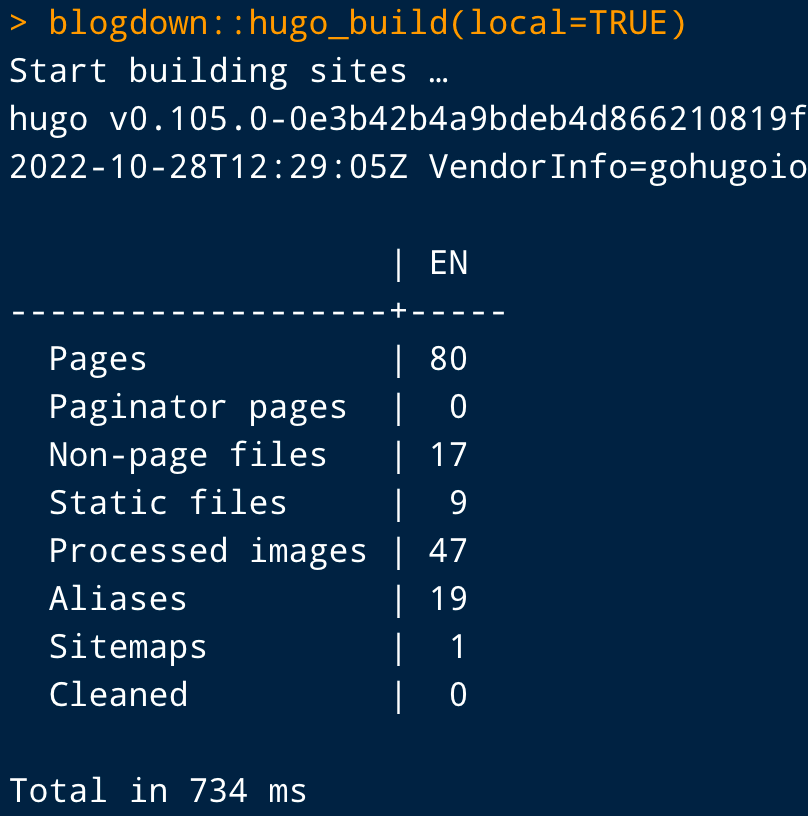
All the actual files of the website are stored in public/ folder.
To preview the website using
blogdown::serve_site()

config.yaml: Hugo and theme configuration file..Rprofile: File to set up your blogdown options.netlify.toml: File to set up your Netlify options.content/: Website source files to edit and add, such as blog posts.themes/: Hugo theme.
Basic Customization
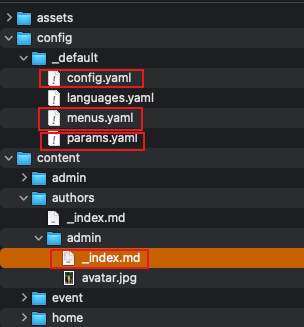
The basic files that you want to modify to customize your website are the following:
config/_default/config.yaml: general website informationconfig/_default/params.yaml: website customizationconfig/_default/menus.yaml: top bar / menu customizationcontent/authors/admin/_index.md: personal information
Uploading files to github repository
Moving the files of public/ in MyOwnWebsite directory into [your_github_names].github.io directory and then using git to push all the files to the remote repository in both [your_github_names].github.io and MyOwnWebsite.
git add -A
git commit -m "update blog"
git push origin master # main
Creating Github Actions
Opening MyOwnWebsite Repository (Actions -> New workflow) to create deploy.yml.
name: deploy_blog

on:
  push:
    branches: [main, master]
  pull_request:
    branches: [main, master]
  release:
    types: [published]
  workflow_dispatch:

jobs:
  build:
    runs-on: ubuntu-latest

    steps:
      - name: checkout
        uses: actions/checkout@v3
        with:
          submodules: true

      - name: Setup Hugo
        uses: peaceiris/actions-hugo@v2.5.0
        with:
          hugo-version: '0.105.0'
          extended: true

      - name: Build
        run: hugo --minify

      - name: Deploy
        uses: peaceiris/actions-gh-pages@v3.8.0
        with:
          deploy_key: ${{ secrets.ACTIONS_DEPLOY_KEY }}
          external_repository: HuaZou/HuaZou.github.io
          publish_branch: master
          publish_dir: ./public
          allow_empty_commit: true
Deployment
We need to connect the Github Pages repository ([your_github_names].github.io) and blog repository (MyOwnWebsite) through ssh key. Go to ~/.ssh/.
ssh-keygen -t rsa -C "zouhua1@outlook.com" -f "MyOwnWebsite"
private key is for MyOwnWebsite (
settings -> Secrets) and add it asACTIONS_DEPLOY_KEY(Must use this name because the deploy_key uses secrets.ACTIONS_DEPLOY_KEY and is from ssh-keygen).public key is for [your_github_names].github.io (
Deploy keys)
When you upload your files to MyOwnWebsite and github will automatically compile the files and then deploy html files to [your_github_names].github.io to render your website.